

MY SPEEDSTER CAPSTONE PROJECT
914 TYPE 4 ENGINE BUILD
A BREIF EXPLINATION OF THE COMBUATION ENGINE
Engines are the basis of the modern world. From early steam-powered locomotives to today's extremely effecient and expertly engineered engines that power cars, boats, trains, and so much more. Early steam engines were a fairly simple concept, using steam to push a piston or pistons up and down in order to turn the crankshaft which in turn would spin the wheels. Today's engines are vastly more complex, however they use the same principal, the burning of a fuel ( typically gasoline rather than coal) in order to power a piston or series of pistons attached to a crankshaft. The modern gasoline engine relies on fuel injection into the cylinder for the piston, a series of valves designed to accurately allow air in to the cylinder to combust and sequentially exit the cylinder through a seperate valve or valves in the form of exhaust fumes. Throughout my breakdown of this project, I will describe the process and use pictures taken by both my grandfather (and mentor) and myself.

This is the starting point of my project, a kit car based on a 1957 Porsche Speedster. A rear engine, rear wheel drive vehicle, meaning that the engine is behind the rear axle of the vehicle which it powers. The engine in the vehicle in this picture had a blown head gasket, the seal which ensures the cylinder has adequate pressure in order to spin the crankshaft, spinning through the transmission, the driveshaft, the axle, and finally the wheels.

The beginning of the teardown. Here the engine has been relatively untouched. Other than removing the covers on the carburetor and the cowl house the engine looks similar to the final product.

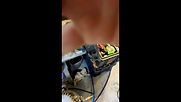
At this point all that can be removed prior to dropping the engine out of the vehicle has been. The only points attached to the frame are four bolts and the exhaust pipe.

The exhaust pipe proved to be a challenge and an angle grinder was used to cut the stripped bolts

The engine is out of the car, and now it's time to begin assembling the new one.
THE BUILD

As it is impossible for oil to circuilate through the engine it is crucial to lubricate everything prior to installation
Here I am heating the crankshaft gear to nearly 700 degrees celcius in or to force it to expand enough to slide on to the crankshaft with nearly no friction. Minor scratches on the crank can cause an imbalance in the engine creating a chain reaction the once again renders the engine inorperable.

Removing any dirt and dirt and rough surfaces ensures tight seals and engine longevity


The piston has been attached to the connecting road and the cylinder has been slid down the head studs which are bolted through the head of the engine and secured in the block


Assembling an engine requires perfection and nothing less. For example, if one valve is off by a thousandth of an inch it could cause a chain reaction ultimately causing the engine to be inoperable.


The dot on the crankshaft might align with the two on the camshaft or timing will be off
A first and final look at the engine with the crankshaft, the camshaft, and pistons installed as well as the crank and cam gear alligned properly before assembly
This is the crankshaft end of a connecting rod. The thin metal in the middle of the photo is the rod bearing, a finely machined extremely smooth piece of metal that, when lubricated, ensures the connecting rod can rotate around the crankshaft in order for the piston to smoothly complete its stroke.

As the two sides of the boxer style engine come together a good amount of force is required in order to ensure a proper seal is created and there are no gaps.
Here the bottom end of one of the heads and the cylinders are visible. Due to this engine being air cooled, meaning it uses passing air rather than coolant to maintain temperature, we opted not to use a head gasket as the machined, metal on metal seal will be far more reliable and will cause less problems down the road

This picture shows the both cylinders as well as one of the heads installed on to the engine. Note the way the metal has been cast clearly incereasing the airflow around the head and cylinders in order to insure ideal temperatures are maintained.

This side view of the piston shows the ring that insures the wrist pins do not slide around as they connect the bottom end of the piston to the connecting rod. Notice the red assembly grease used in order to guarantee smooth rotation
The Block is Together!
This is what the engine looks like as it goes in the car, unfortunately with the dangers and risks of installing the engine without a hoist it was impossible to take pictures or videos of the engine going into the car

Here is a little snippet where the engine is being jacked up into place using a motorcycle jack
Installation
The Final Result
Here is the final product. Although it seems like from the photo of installation to here there is a lot missing, please see the paragraphs related to disassembling the old engine and reverse the order. The brand new engine started on its third crank and ran like a dream... until it didn't. The aftermarket oil cooler (the piece with the two blue nuts) took more oil than the manufacturer claimed, and ran the engine dry.

Learning outcomes
Critical Thinking: Certain engine components varied from the original engine to the replacement as they were slightly different meaning that certain pieces had to be removed from the old engine and reused in order to have the cowl fit on the engine and the engine in the car.
Problem Solving: The heads of this engine had a different angle for the spark plugs than the original engine had meaning that the holes in the cowl did not line up with the wires for the spark plug. In order to make the cowl fit we had to drill holes in the cowl for the spark plugs and use silicone and plastic caps to fill the holes for the previous spark plugs to ensure that the cowl would still be functional.
Research Skills: Through countless hours of research, both documented and whenever I had a free couple of minutes, both my mentor and I failed to see anything mentioning the additional oil that would be needed due to the oil cooler. This was an especially hard pill to swallow considering the amount of time, energy, and money that went into the project; however, looking back on it I learned so much that even though the end result did not work, we know exactly how to do it again and what went wrong. I am looking forward to trying again.